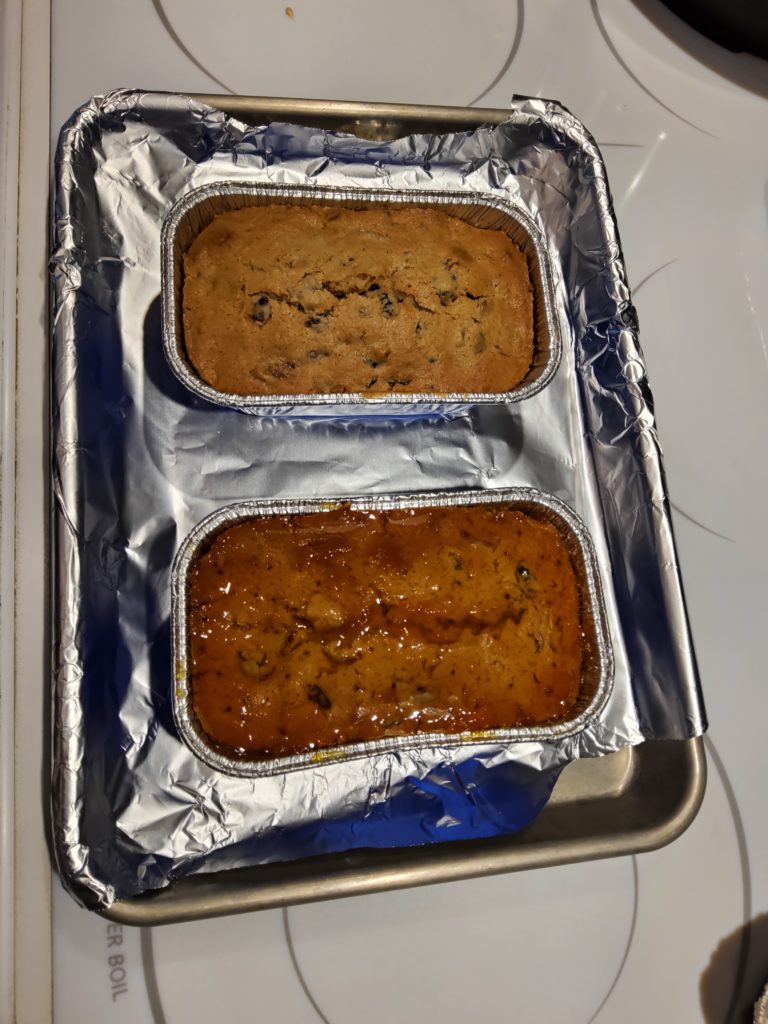
Suz’s Gluten Free Christmas Cake
Most people have a love/hate relationship with Christmas cake. It is the brunt of many jokes every year – but also a tradition. Yes, it’s rich and seems to last forever. That’s because it is usually soaked in spirits, making it very tasty. Personally, I wasn’t a fan of Christmas cake growing up because I didn’t like the little red and green chewy bits in it. Once I could make my own though, Christmas cake took on a whole new priority in my must-have Christmas baking. The big challenge this year was making it gluten free and having to make my own citron (candied peel). Mission accomplished! This recipe makes one regular size or two small Christmas cakes. I prefer making the smaller versions so I can have one with an apricot glaze and the other with a marzipan icing.
So if you are eating gluten free and missing Christmas cake, try this out. It’s really quite simple to do but you have to plan it over two days so you can soak the dried fruit properly. Plan for that and you’ll be enjoying an amazing, gluten free Christmas treat you can share with your friends and family!
Ingredients
Day 1:
1 C mixed dried fruit (any preferred combination of raisins, cranberries, dates, apricots, apples etc. I use 1/3 C dark raisins, 1/3 C sultanas, 1/3 C cranberries)
1/4 C citron or candied peel (see SuzFoods recipe to make your own)
1/4 C orange juice
1/8 C brandy (opt: or can substitute use rum, sherry, wine etc.)
Day 2:
1/3 C butter, melted
1/2 C brown sugar, packed
2 T buttermilk (or sour cream or yogurt)
1 egg
1 C Bob’s Red Mill 1:1 gluten free flour
1 t baking powder
1/2 t cinnamon
1/2 t mixed spice or pumpkin spice
1/4 t nutmeg
1/4 t salt
Toppings (opt):
1 T apricot jam
marzipan or almond paste
Instructions
Day 1: This only take a few minutes to do. Use a bowl large enough to add the batter the next day.
Mix together the dried fruits, orange juice and optional brandy or spirits. Cover and let rest at room temperature for a day or overnight. The fruit will absorb most or all of the liquid when ready.
Day 2: I use foil loaf pans so I can bake and store in the same container. This makes 1 regular loaf (approx 4X8 in) or 2 mini loaves (approx 3X5 in).
In mixer or food processor:
Blend melted butter and brown sugar. Add milk and egg. Mix 1-2 minutes until blended.
Combine dry ingredients in measuring cup or bowl. Add to creamed mixture and continue to mix 1-2 minutes until smooth. This will be a thick batter.
Add batter into the soaked fruit mixture and fold until well combined. Let mixture rest while preheating oven and preparing loaf pans
Preheat oven to 350F.
Butter inside of the loaf pan and line bottom with parchment paper for easy removal of cake when done.
Carefully spoon batter into the loaf pan(s) to avoid air bubbles. Smooth top.
Bake 350F for 30 min. Reduce heat to 325F for another 15 min. Check with knife or skewer. If still sticky, continue to bake for another 10-15 min.
A regular loaf should take the full 60 minutes to bake. The mini loaves should be done within 40-45 minutes.
Remove from oven when done and let rest to cool to room temperature in pans. Add optional toppings as per instructions below.
Toppings:
Glaze – while cake is hot from the oven, poke multiple holes with skewer into the cake. Spoon the apricot jam over the top of the cake. it will set as the cake cools
Marzipan – Let cake cool completely and chill. When cooled, add marzipan icing to the top of the cake and refrigerate.
